


NodeRun is the newest Profound Logic product dedicated to making it easier for Node.js developers to create applications by moving development to a cloud-based environment. NodeRun comes with a full IDE with Visual Designer, editor, debugger, and Node.js already pre-installed. Some of NodeRun's most notable capabilities include design screens, the ability to develop and run application within the program, full debugging capabilities, the ability to install NPM packages, manage your own Node.js server, work with active sessions to see end-user activity, host database and built-in Database Explorer, a command-line terminal for full control of your space, as well as the ability to share and collaborate with other developers.
Getting started with NodeRun is quick and easy. All you need is a modern internet browser (Google Chrome, Mozilla Firefox, etc.) and that's it. Every NodeRun Space is free to build and comes with its own files, database, and server. To get started visit NodeRun.com create an account and begin developing, it's that easy!
This 8 part blog series will give you a series of exercises to help you build a Node.js applications that work with employee data. Last week we left off with you creating an Employee Grid within the visual designer. This week we are going to enhance that grid and add the capability to review record data within that grid.
Exercise 5 - Enhancing Your Employee Grid
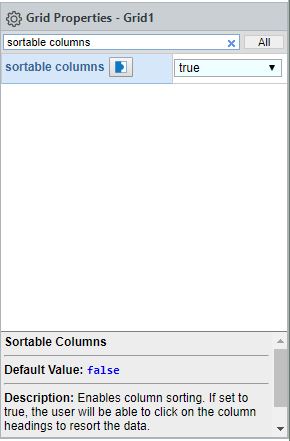
Within the IDE Visual Designer, select the grid that you have created and go to the Grid Properties on the right of the screen. Within the properties window, search for the below properties and set them to TRUE.
- Sortable Columns
- Movable Columns
- xlsx Export
- Find Option
- Filter Option
- Hide Columns Option
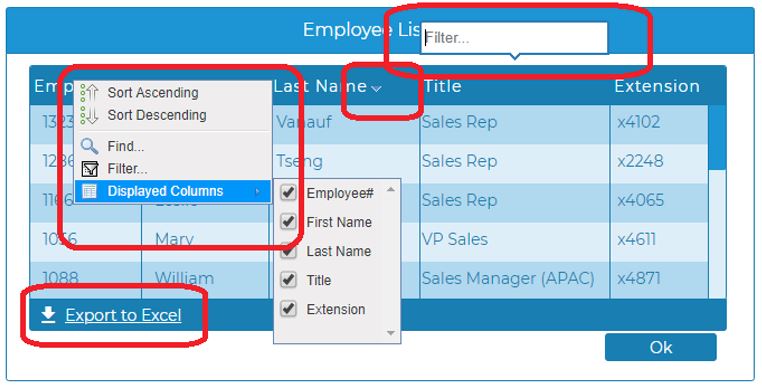
After you have enabled these properties Save your work and run the Employee Listing App in another browser to test of the features.
Exercise 6: Connect Employee List to Lookup Function
This next exercise will give users the ability to click on any employee within the grid to see the designated employee details that you are specifying.
Configuring Row Selection
Once again, in the IDE click on the employee list grid to highlight it. Go to the Grid Properties window on the right-hand side (just like in the previous exercise). Use the search bar to find the row selection property and select the single value from the drop-down menu. Next, select the selection field property and bind it to a boolean named selected.

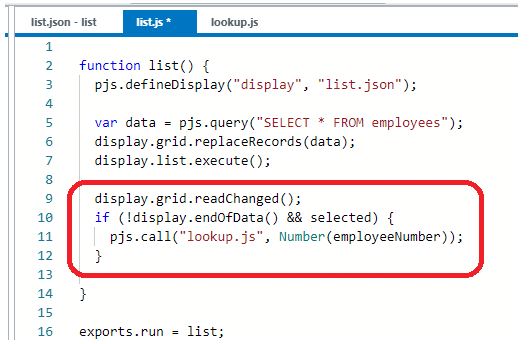
After you have set those property values you will want to add a call from your list.js tab (created in Part 3 of this guided lab). The below code will call your look.js when the employee number is referenced.
Code Explained

- The readChanged() method reads the grid for changed records one at a time and populates display fields from the records found
- display.endOfData() returns a boolean value of true if no changed records were found
- selected is the boolean field we used to identify whether a specific record is selected or not
- pjs.call() calls another script or program
- Number() converts a delcared strongly-typed field to a primitive JavaScript value, which forces the employee number to be passed by value rather than by reference
Alternative Approach
There are multiple ways that you can retrieve record data from a grid. Using ES6 syntax, we can quickly retrieve all the selected records into an array and then use the first record in the array.

SelectedRecords [0] works well because single selection only allows one record to be selected at a time.
Modify lookup.js to Receive Parameter
Select the look.js tab and modify the code to match the below parameters.
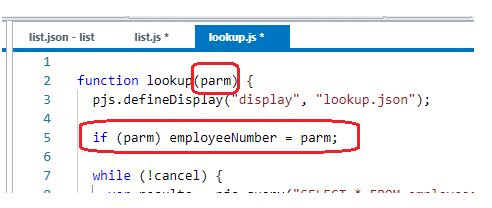
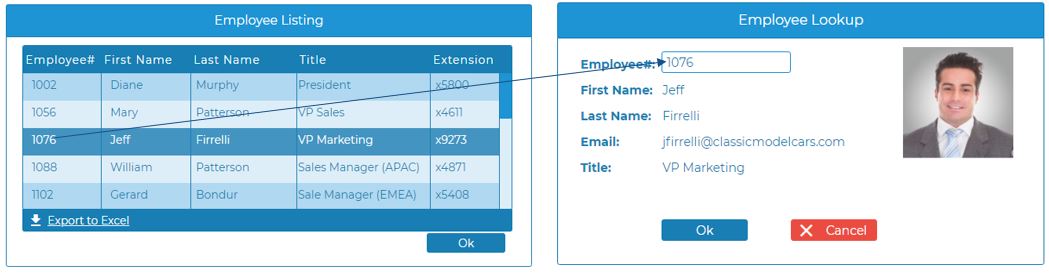
Check to see if parm was passed, and if so, assign to employeeNumber as the default value. If you do not check for the existence of the parameter, a data decimal error may occur and keep you from accessing the employee data. When you test the connected modules it should look something like this:
In our next post, we will learn how to use NodeRun when Listing Web Service.
If you missed out on any of our previous Guided Labs here is a recap of those exercises:
- Guided Lab: Employee Data Application Part 1 showed you how to build your employee lookup application from scratch.
- Guided Lab: Employee Data Application Part 2 showed you how to use the database-driven auto-complete option and how to add a dynamic image to your display.
- Guided Lab: Employee Data Application Part 3 showed you how to create an employee listing application with a grid of your employee's records.
