


Profound UI ships with a cornucopia of widgets for effortlessly building applications. Occasionally, a widget in a different JavaScript library might solve your problem more directly. While we take requests to add widgets to our framework and are constantly working on improvements, we can’t implement every requested feature quickly, so it may make more sense for a developer to pull in a widget from a different library.
This series will explain how you can use widgets from a separate, unrelated library of widgets—PrimeUI—so that you can populate these widgets with data from a server and submit data from the widget back to the server. Not only will these widgets be usable in your production environment, you can also see them rendered in design-time in Visual Designer for drag and drop design.
This article will cover installing the PrimeUI code and connecting it to Profound UI.
The PrimeUI widget, “rating”, will be used as an example. A file at the end of the article also includes code to wrap a PrimeUI “date picker” widget.
Code from, “Painlessly Passing Custom Widget Input Data to the Server,” will be used to take input from our sample widget and help pass it to the server. You may want to review that article before digging into the code in this article.
PrimeUI
PrimeUI is a free, open-source, third-party library of JavaScript/CSS widgets used for IBM i development. To begin using PrimeUI, some CSS and JavaScript files will be downloaded and stored on a web server running Profound UI.
Files must be downloaded somewhere Profound UI can access them—likely either in the “htdocs” directory for an instance of an IBM HTTP Server (by Apache) running Profound UI, or the “htdocs” directory of an instance of Profound.js. In this article we assume the files are downloaded into a directory named “primeui” in the document root of an IBM HTTP server instance. For example, if you have an instance of Profound UI named “PROFOUNDUI” that is setup under the IFS path, “/www/profoundui”, then the PrimeUI files will go into an IFS directory named “/www/profoundui/htdocs/primeui”.

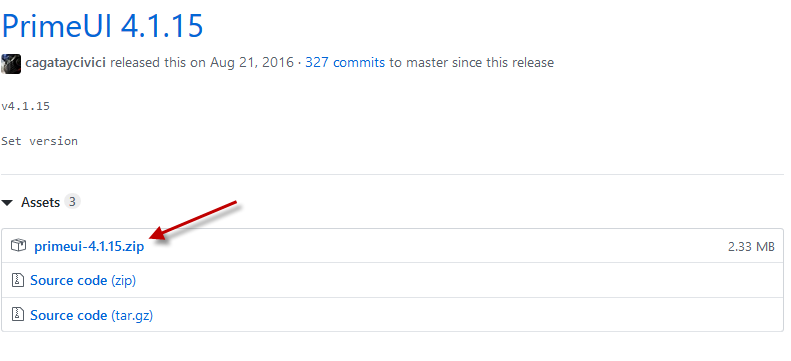
Download the files from here: https://www.primefaces.org/primeui/ by clicking the download button, then click the link to the latest version’s zip file,
“primeui-4.1.15.zip” in this case.
Save the zip file to your PC. Create the “primeui” IFS directory if it doesn’t exist in the Document Root of the instance of Profound UI. (e.g. in QSH on the IBM i do “cd /www/profoundui/htdocs/” and then “mkdir primeui”). Upload the zip file into that “primeui” directory. Unzip the file into “primeui” (e.g. in QSH do “unzip primeui-4.1.15.zip”).
You should now have some files in the primeui folder, including these:
- primeui-all.min.css
- themes/redmond/theme.css
- primeui-all.min.js
Next, download the file “prime-profound-fix.css”, linked at the end of this article, and upload it into the “htdocs/primeui” directory. This file fixes some PrimeUI CSS that clashes with Profound UI CSS.
When those files exist, then the PrimeUI library code is on the webserver ready to be used. Note that those files are not automatically loaded with sessions running Profound UI, because they are not located inside /profoundui/userdata/custom/. We do not want the PrimeUI code to load unless a screen explicitly uses those widgets. (Doing so potentially saves network bandwidth and improves the time needed to render the session at sign-on.) Some custom code included later in the article will load the PrimeUI files on-demand.
Connecting a PrimeUI Widget to Profound UI
Now that the PrimeUI files are in place, we need a way to tell Profound UI how to use some of the PrimeUI widgets. There is no automated or trivial way for connecting PrimeUI widgets into the Profound UI framework. Instead, each widget must be attached manually using Profound UI’s Custom Widget API. Basically, wrapper code must be written around each PrimeUI widget so that Profound UI can use it.
Code to wrap a Rating widget is provided further below. Also, code is provided for connecting the pieces in a uniform fashion.
As explained in the article, “Painlessly Passing Custom Widget Input Data to the Server”, in the “Create a Basic Custom Widget” section, a few steps in adding a widget to Profound UI include:
- Define properties of the widget, including “property setter” functions
- Define custom properties when necessary
Property setters are needed because of how Profound UI renders widgets: by adding an HTML element to the DOM (the page), then by reading properties stored in the Rich Display file, and by calling property setters for each property, applying the stored value to the widget.
Knowing how Profound UI works with widgets, we look at how PrimeUI widgets are setup in order to bridge the two. PrimeUI widgets have options, events, and methods, as you can read about in the PrimeUI documentation—for example, Rating. We must review a widget’s documentation and decide which PrimeUI options, events, and methods we want to make available in Profound UI. Whichever of those we decide to use will become widget properties in Profound UI, and we will write property setters for them.
Decide Which Properties to Support
As our example we use the rating widget--

--a simple input widget that allows a user to specify a non-negative integer value that represents, for example, how much they enjoyed talking to your support staff (hopefully 5 out of 5 stars).
Not every aspect of the PrimeUI widget needs to be adopted; you can implement only what you need. Implementing new properties as needed later is not problematic if the widget uses default values for those.
If we look at the page for a PrimeUI Rating widget there are two configuration options, stars and cancel:
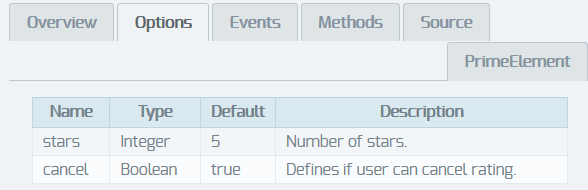
These two seem useful; we want a developer to be able to drag and drop the widget onto the canvas and choose the number of stars and whether there is a cancel button with a few clicks. So, we will keep those in mind.
There are also two events, “rate” and “oncancel”:
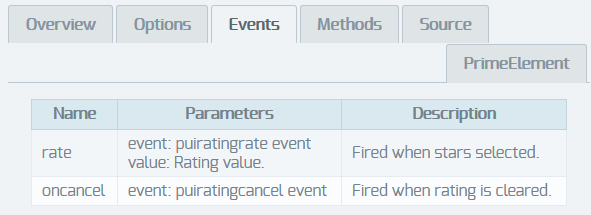
To demonstrate implementing PrimeUI event handlers, we will define properties for “onrate” and “oncancel”, which can run custom JavaScript when stars are selected and a rating is cleared, respectively.
Finally, there are methods:
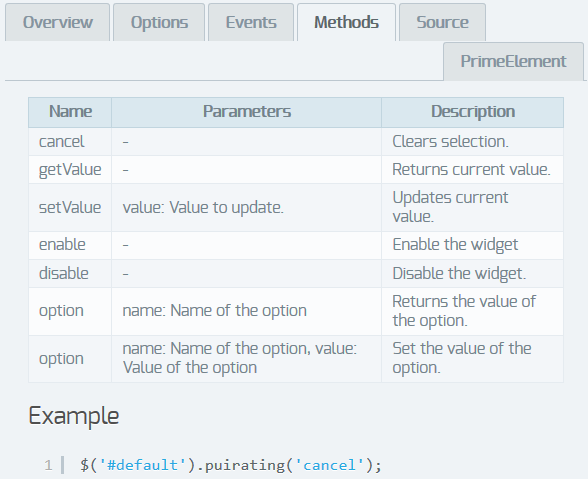
These methods change or return the state of a Prime UI rating widget. Some will not be used; some can be used as Profound UI properties; our wrapper code will need others:
- cancel: because we will already provide a way to clear the rating—by clicking on the cancel button—we will skip this
- getValue: when a page is submitted to the server, Profound UI will need to know chosen values, so our wrapper code will need this
- setValue: when a page is loaded from the server the rating widget should display a saved value, so our wrapper code needs this
- enable and disable: looking at other input widgets in Profound UI you can see a “disabled” property. So, we could support a “disabled” property in a rating widget by wrapping the enable and disable methods. (This demonstrates using a built-in Profound UI property rather than defining a new property.)
- option: these methods can be ignored, because our widget will only be setup when the screen is rendered, and none of its properties will be changed by APIs.
That covers part one of using PrimeUI’s Javascript widgets for development inside of Profound UI. Using these widgets can help modernize your IBM I application interfaces faster and easier than doing it all yourself. Keep a lookout for part two, which will focus on writing the required property setters.
