


 Hi everyone! For this week's tips & tricks blog, I'm going to cover using Layouts in the Profound UI Visual Designer.
Suppose you are designing a rich display that has some customer and order information. A way to give your screen a more modern look is to use the concept of layouts and panels. They provide a simple way to get data clearly grouped into a clean looking style. Profound UI provides both Layout and Panel widgets to get you started. I'll cover the use of Panels in a later blog post.

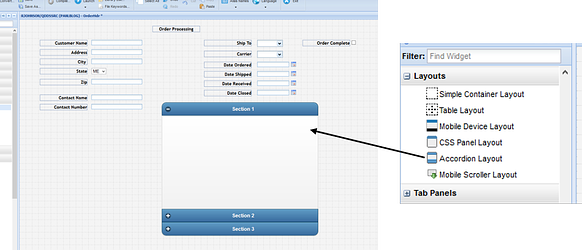
In this simple example, you have some customer data, shipping data and a few key dates on the same screen. For a 5250 screen display you might have used hard coded dashes (----) or dotted lines (……) around them as way to group them. For rich display consider using a Layout widget to accomplish the same goal. Let’s start with Layouts. (http://www.profoundlogic.com/docs/display/PUI/Using+Layouts)
Layouts in Profound UI are special types of widgets that can contain other widgets within them. They are divided into one or more container sections. Depending on the type of layout used, the container sections can stretch to fill up the space available. Layouts can also embed other layouts, which provides a lot of flexibility for your application design.
Most importantly, elements placed within layouts can be positioned and sized relative to their parent container rather than absolutely. For mobile applications this is significant because you cannot always predict the screen size of the device. The user can also rotate the device, which changes the effective screen size on the fly. Profound UI ships with several types of layouts and they can all work together.
Just by way of example, let’s use the Accordion Layout. Drag and drop the widget on to the canvas and resize it a bit to hold the screen elements we want to move in:
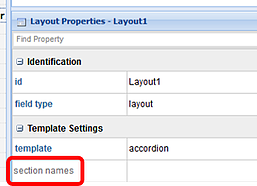
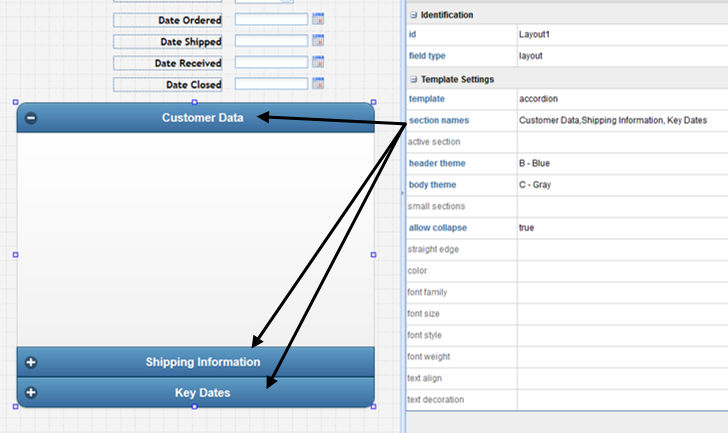
The default layout has three sections. You can change the “section names” property to re-label them with appropriate headings:
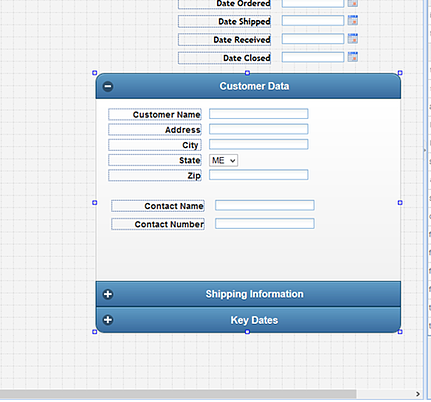
If you add more names the layout will expand to the necessary number of sections to support the list. For our example we might use Customer Data, Shipping Information and Key Dates as our section headings. Now we have meaningful containers into which we can place our data.
Drag each element individually into its appropriate container section in the layout. As you drag the element in, make sure that you see it being successfully attached by looking for a temporary change to the Layout section’s background (it should gray slightly) and the section will take on a border effect. This ensures that the label widget Customer Name has been attached to this section of the layout. When you release the item, the section should return to normal. Try moving the Layout widget around a little and note if the Customer Name label widget moves with it. If not, you can move the label out on the canvas and then drag it back in again. You’ll quickly get the hang of adding items to the layout section.
Now Customer Name and any other widgets you attach to this section will move along with the Layout as you re-position it:
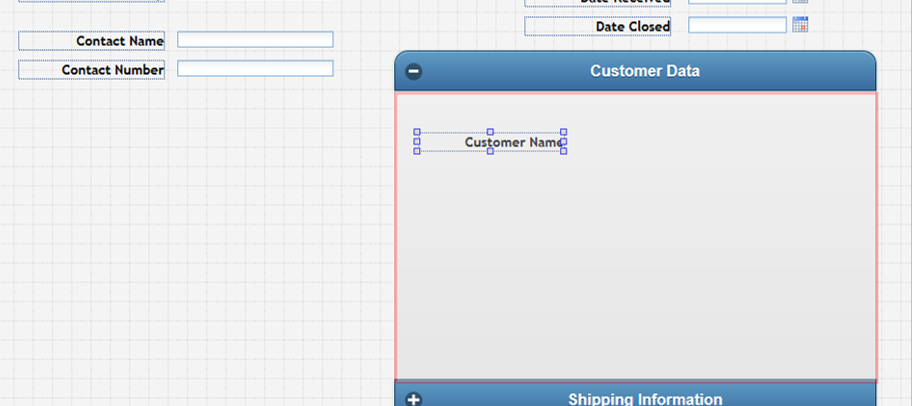
Here’s what all the Customer data might look like in the first section:
Continue the same process until all the elements you want are placed in the proper section. Now when you re-position the Layout widget, all your elements will stay in the sections to which you added them. If you see any elements missing, just place them on the layout section as needed and make sure you see that they are added successfully. Experiment with some of the Template Settings properties of the Layout widget to get the effect you’re looking for.
And that's it. Next time... using Panels!
