


Profound Pro Tips is a blog series focused on issues that our support team receives and questions our Profound Logic customers have. Don't see your question/concern in Profound Pro Tips? Please feel free to contact our team or leave us a comment below.
Today’s Topic: Custom Context Menus
Some Profound UI users would prefer to replace information anchored to the screen with a popup context menu, but linking the popup to the anchored text so that the user can use the function buttons can be tricky, especially when you have multiple lines of data. Below is a context menu specific example of our Profound Pro Tip: Creating Custom Tool Tips.
Setting Up Your Screen
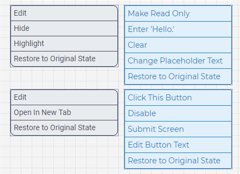
First, you’ll want to set up your screen. In the screenshot below, you can see that we have some content and some menus to be the context menus of that content.
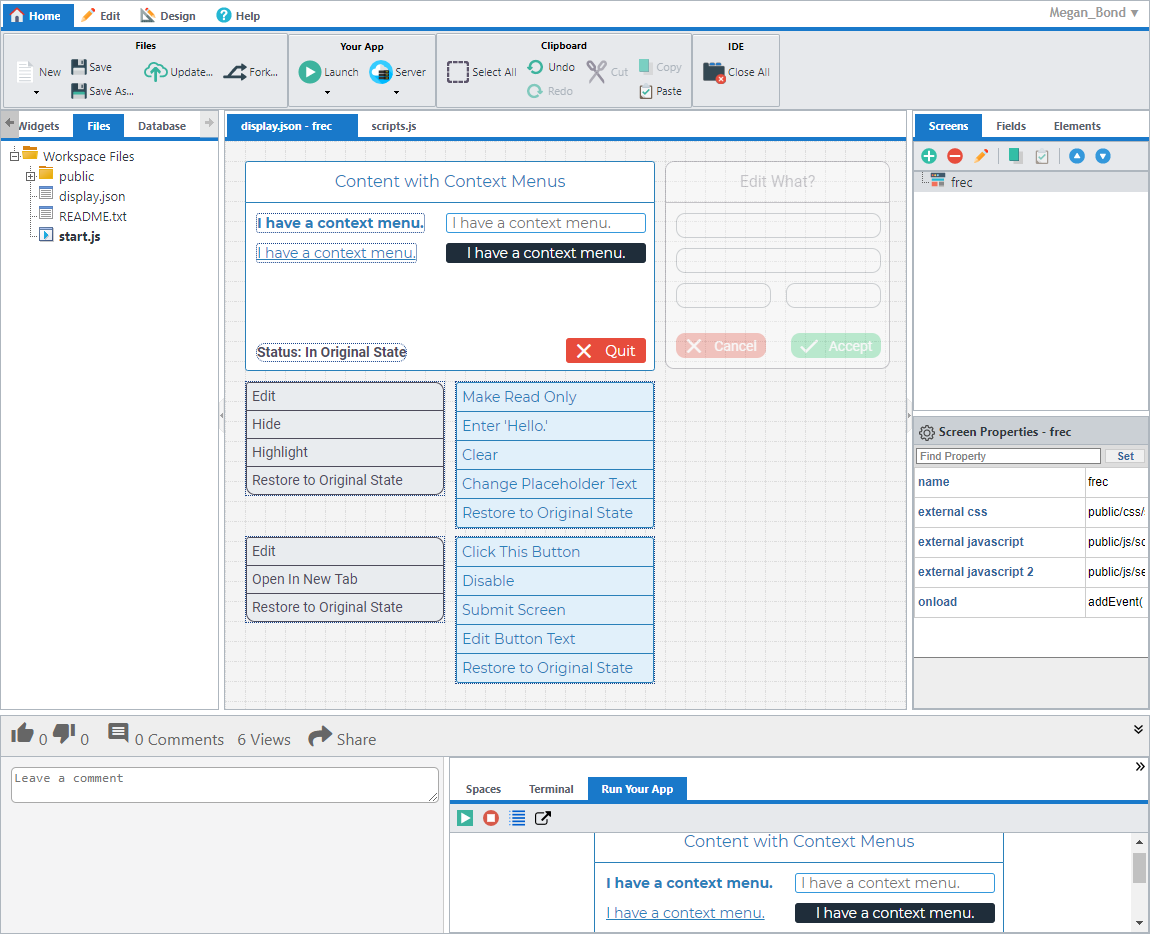 The four widgets with the text “I have a context menu.” will be the ones getting the menus in this example.
Blocking the Default Context Menu
When using custom context menus, you want only your context menu to show up, not the browser’s. To prevent the browser's context menu from popping up, we added the following code to the onload event:
addEvent( document, "contextmenu", function(e) {
preventEvent(); // Prevent default context menu from popping up for all elements on screen.
});
In the above code, you can see that the addEvent() (http://www.profoundlogic.com/docs/pages/viewpage.action?pageId=3276841) and preventEvent() (http://www.profoundlogic.com/docs/pages/viewpage.action?pageId=3276831) APIs are used to prevent the default context menu from popping up. These are Profound UI APIs. To learn more about them, please check out their documentation pages.
Showing and Hiding the Context Menus
Now that we have all our widgets and such on the screen, it’s time to use JavaScript to get them working. The following code is used to check if the right mouse button was clicked:
var isRightMouseButton;
if ("which" in event) // Gecko (Firefox), WebKit (Safari/Chrome) & Opera
isRightMouseButton = event.which == 3;
else if ("button" in event) // IE, Opera
isRightMouseButton = event.button == 2;
if (isRightMouseButton) { … }
This next code is used to show the corresponding menu when the element is right-clicked:
menu.style.visibility = "visible";
menu.style.left = event.clientX + 10 + "px";
menu.style.top = event.clientY + 10 + "px";
menu.style.height = "fit-content";
And the code below is used to hide the menu when an option is clicked, or the mouse leaves the menu.
menu.style.visibility = "hidden";
menu.style.left = "-2000px";
menu.style.height = "0px";
We have several widgets needing the same code. Instead of wasting all the effort adding this code to each of the elements, making the code harder to maintain, let’s make a function that we can call instead. Below are the functions I came up with for this example, but there are plenty more approaches to this.
function isRightClick( menu, event ) {
var isRightMouseButton;
// For Gecko (Firefox), WebKit (Safari/Chrome) & Opera, was the object right-clicked?
if ("which" in event) isRightMouseButton = event.which == 3;
// For IE & Opera, was the object right-clicked?
else if ("button" in event) isRightMouseButton = event.button == 2;
// If the object was right-clicked, show the menu.
if (isRightMouseButton) showMenu( menu, event );
// Else, hide the menu.
else hideMenu( menu );
}
function showMenu( menu, event ) {
// Show the menu.
menu.style.visibility = "visible";
// Move the menu to the cursor’s position.
menu.style.left = event.clientX + 10 + "px";
menu.style.top = event.clientY + 10 + "px";
}
function hideMenu( menu ) {
// Hide the menu.
menu.style.visibility = "hidden";
menu.style.left = "-2000px";
}
function onMouseLeaveMenu( menu, event ) {
// Make sure that the mouse actually left the menu and is not just
// over one of the options.
// This is the original element the event handler was assigned to.
var e = event.toElement || event.relatedTarget;
// Check for all children levels (checking from bottom up)
while(e && e.parentNode && e.parentNode != window) {
if (e.parentNode == menu|| e == menu) {
if(e.preventDefault) e.preventDefault();
return false;
}
e = e.parentNode;
}
// The mouse left the menu, hide it.
hideMenu( menu );
}
I saved this to the JavaScript file ‘scripts.js’ and linked to it using the external javascript property (http://www.profoundlogic.com/docs/display/PUI/External+JavaScript). If you are doing this in Profound UI, you can save the file to /www/your_instance/htdocs/profoundui/userdata/custom/js to have it pulled in automatically for you.
I then add the following function calls to the widgets and their context menus:
Onmousedown the four widgets getting a custom context menu:

// "menuID" is replaced with the corresponding menu's id.
// "textMenu", "inputMenu", "linkMenu", and "buttonMenu".
var menu = getObj( "menuID" );
isRightClick( menu, event );
Onmouseout event of the four menus:
onMouseLeaveMenu( this, event );
// Because the object we want to affect is triggering the onmouseout event,
// ‘this’ will be referencing the menu object.
Onoptionclick of the four menus:
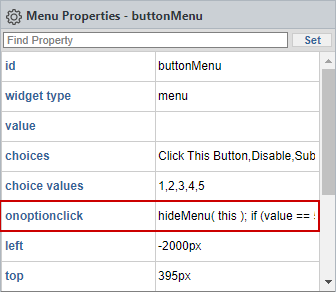
// An option was selected, hide the menu.
hideMenu( this );
Finishing Up
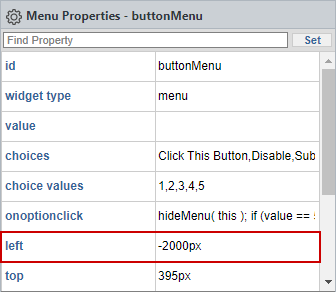
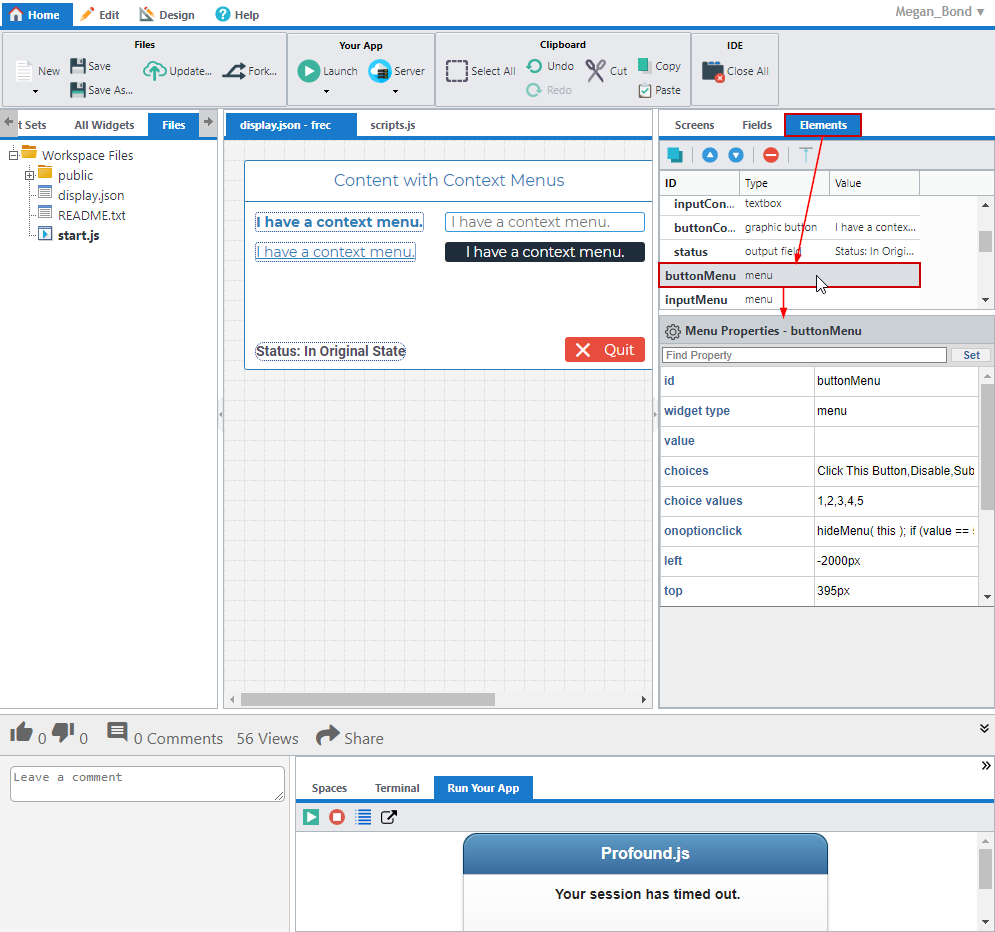
Now the menus pop up and hide as you interact with the widgets, but all of the context menus are visible when the page loads. All you need to do to fix this is set the left property of the menus to -2000px. This will move them off screen and out of sight until the proper event shows them.
Now that the menus are off screen, they are also off screen in the designer. You can use the Elements tab of the Screens panel to continue to work with them if you need too.
Now let’s see it in action!
 Customizing and Making the Options Do Stuff
This code can be customized and moved to other widgets and other events. Your screen is what you make it. Below are some additional helpful links to further customize your popup context menu:
Oncontextmenu Event: https://www.w3schools.com/jsref/event_oncontextmenu.asp
addEvent() to add the oncontextmenu event, or any other event, to a widget: http://www.profoundlogic.com/docs/pages/viewpage.action?pageId=3276841
pui.Timer() to have the menu disappear after a period of time of no interaction or mouse leaving: http://www.profoundlogic.com/docs/display/PUI/pui.Timer+object
CSS Animations to animate the menu in various ways: https://www.w3schools.com/css/css3_animations.asp
